To find the right bottle label size, measure the usable label panel on the actual container. Choose how far the label should wrap, leave the agreed gap or overlap, and check a full-size paper mockup before ordering. Bottle capacity alone cannot give you the finished label dimensions.
This guide is for buyers preparing custom product labels for bottles and jars. It covers wraparound labels, separate front and back labels, and tapered containers, with a worked calculation you can adapt to your own measurements. Once the fit is established, compare the material and print options for custom labels and stickers.
The measurements to send your printer
- Finished label width and height, with units.
- The container reference and usable label panel.
- A gap, overlap or front-and-back arrangement.
- Manual or machine application, plus a photograph of the proposed position.
Why an 8 oz or 500 ml bottle does not have one label size
Capacity describes what the bottle holds. The label fits its outside surface. A short, wide bottle and a tall, narrow bottle can hold the same quantity while presenting different spaces for artwork.
Ask the bottle supplier for the drawing of the exact container reference. Look for a label panel or recommended decoration area, rather than copying the overall bottle height into a label order.
For a concrete example, Berlin Packaging’s drawing for 4699B07-B, a 4 oz / 120 ml glass Boston round bottle, lists a label panel of 5.785 inches wide × 2.375 inches high. Using 25.4 mm per inch, that is approximately 146.94 × 60.33 mm. These are the supplier’s panel dimensions for that item, not a universal 4 oz label size or an instruction to order a label that fills the entire panel. Berlin Packaging container drawing
Record the container reference beside the proposed label dimensions. That small step helps prevent a future bottle substitution from becoming an unnoticed label-fit problem.
Step 1: Identify the usable label panel
Set the bottle upright and identify the area intended to carry the label. Mark the proposed top and bottom edges on a removable paper strip. Keep the shoulder, heel, molded features and any existing decoration visible while you plan the position.
Measure the height between those marks. For a wraparound design, also measure the circumference at both marks; a difference is a reason to investigate taper before using a rectangular outline.
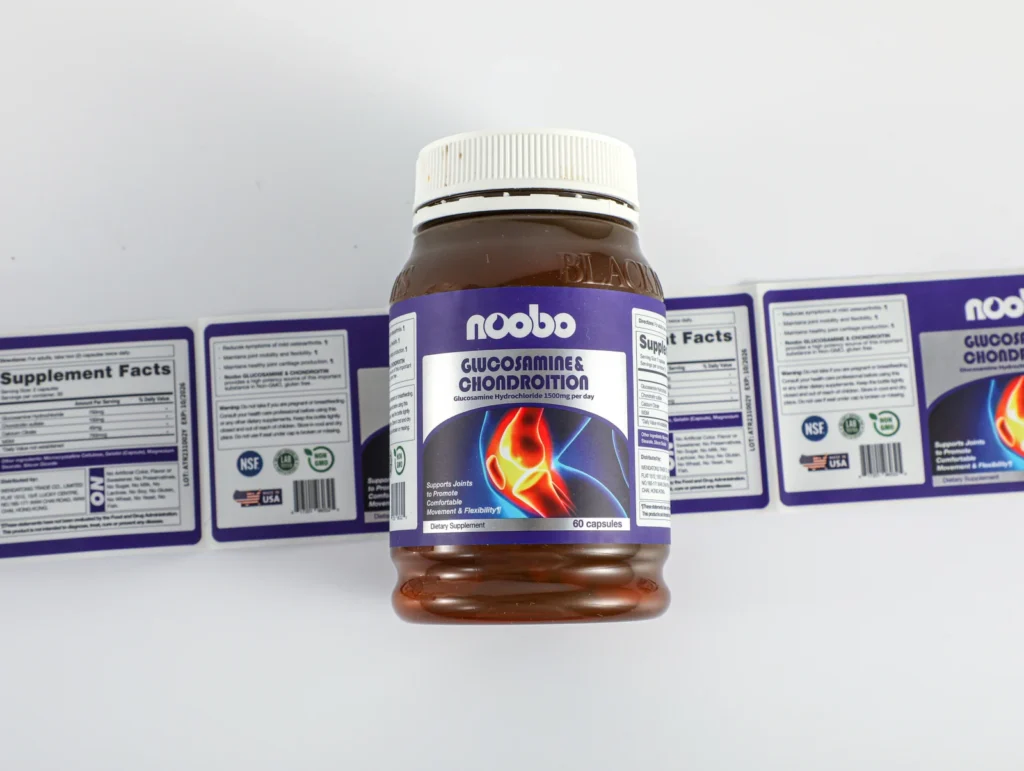
The company sample photograph accompanying this guide shows a labeled bottle beside an extended strip of printed labels. It is useful for seeing the relationship between flat artwork and its curved presentation. It does not provide the sample’s dimensions, material grade or application tolerance.
Do not scale an order from a photograph. Perspective and the distance from the camera change apparent proportions. Use the real container or its supplier drawing.
Step 2: Measure the wraparound width
Use a flexible tape or a paper strip to measure around the intended label position. With paper, mark where the strip meets itself, then lay it flat and measure that length.
Avery’s measuring guide recommends a cut-and-wrap approach: mark the desired edges on paper, trim the shape, check it on the product and measure the resulting outline. The physical check is especially useful when you are deciding how much of the container to cover. Avery label measuring guide
For a circular, straight-sided container, these planning relationships apply:
- Circumference = π × outside diameter at the label panel.
- Label width with a gap = circumference − gap.
- Label width with an overlap = circumference + overlap.
Use the direct circumference measurement when you have it. A diameter calculation is a cross-check, and the formula assumes a circular cross-section. It does not describe an oval bottle or resolve a tapered surface.
Worked example: a 60 mm round bottle
Suppose a cylindrical container measures 60 mm in outside diameter at its straight label panel. The calculated circumference is π × 60 = 188.50 mm, rounded to two decimals.
| Illustrative arrangement | Calculation | Starting label width |
|---|---|---|
| Leave a 3 mm seam gap | 188.50 − 3 | 185.50 mm |
| Add a 4 mm overlap | 188.50 + 4 | 192.50 mm |
| Cover half the circumference | 188.50 ÷ 2 | 94.25 mm |
The 3 mm gap and 4 mm overlap are example inputs, not MEIKEI production tolerances. Agree the actual seam arrangement with your printer and applicator. Where a label overlaps itself, ask whether the proposed adhesive and printed surface suit that construction.
Do not add a gap and an overlap to the same edge arrangement. Include a simple sketch if the wording could be misunderstood.
Step 3: Choose the height and front/back arrangement
Specify where the label sits, as well as how large it is. For a straight panel, a useful planning calculation is:
Label height = usable panel height − top clearance − bottom clearance.
For example, a 75 mm usable panel with two illustrative 3 mm clearances leaves a 69 mm label height. Those clearances still need agreement for the actual container and application process.
For separate front and back labels, provide two finished sizes and a placement sketch. If both occupy the same horizontal band on a cylinder, subtract their widths from the circumference to find the total uncovered distance. That total is shared between the side gaps; it is not automatically the gap on each side.
For example, a 188.50 mm circumference with a 70 mm front label and a 60 mm back label leaves 58.50 mm in total. If the labels are centered opposite each other with equal side gaps, each gap is 29.25 mm. This is layout arithmetic, not an application-machine setting.
What changes on a tapered bottle or jar?
Check the circumference at the top and bottom of the proposed label area. When those measurements differ, a full-wrap rectangle may not match the surface. Send both measurements and the proposed height for a shape review.
OnlineLabels’ tapered-label tool uses top circumference, bottom circumference, label height and wrap coverage to construct an outline. Its instructions also call for a paper fit check printed at actual size. That illustrates why a single diameter is insufficient for a tapered wrap. OnlineLabels tapered label guidance
Keep a tapered outline separate from your finished artwork until the fit has been checked. A good visual match on a flat screen does not confirm how the top and bottom edges will meet on the container.
If a full wrap is unnecessary, discuss a smaller front label as an alternative. The choice should follow the required information and physical fit, rather than stretching an existing design to fill an unsuitable shape.
Finished size, bleed and the safe area are different
Order the dimensions of the cut label. Bleed extends the background beyond that cut line; it does not make the finished label larger. The safe area keeps important artwork inside the cut boundary.
OnlineLabels’ printing support explicitly distinguishes the finished label dimensions from the bleed area. Its Canva instructions specify 1/8 inch, or 3.175 mm, per side for custom printed sheets, with a different allowance for printed rolls. That is a format-specific supplier requirement, not a universal setting to copy into every print job. OnlineLabels custom-printing guidance
For a MEIKEI order, use the agreed dieline and artwork requirements. Include barcode space in the design review; the UPC barcode size guide explains why the symbol and its clear space need separate attention.
Step 4: Check the outline on the actual container
Print the proposed outline at actual size, cut it out and position it on the bottle. Check the seam and clearances, then view the artwork from the front, side and back. Measure the printed outline to make sure the print dialog has not scaled it.
A paper mockup checks geometry and presentation. It does not approve adhesive, moisture resistance, decoration or machine application. Follow it with a sample of the intended label construction before confirming production.
For machine-applied labels, add the finished size to the full roll specification. The applicator also needs the liner width, roll core, roll diameter and orientation covered in the label unwind direction guide.
Send a label-size brief that can be quoted
| Brief item | What to include |
|---|---|
| Container | Supplier reference, material, drawing and a clear photograph |
| Finished label | Width × height, units and cut shape |
| Placement | Height from an agreed reference point; front/back orientation |
| Seam | Gap or overlap, with the intended dimension |
| Artwork | File revision and required printed information |
| Application | By hand or machine; equipment and roll requirements if relevant |
| Order | Individual label quantity, artwork versions and delivery country |
Choose BOPP or paper label material according to the product and its use conditions, then confirm that construction on the chosen container.
MEIKEI’s starting minimum is 100 individual labels. Send the bottle reference, proposed dimensions, artwork and quantity to request a bottle-label quotation. If the size is unresolved, send the measurements and a positioning photo so the discussion starts with the actual package.